Anime style speed line effect
Contents
I appreciated the next videos which explains how to make the effect in details.
I had followed another video in the middle of the way but stopped because some files were not downloadable.
Speed lines
This section was written in June 28, 2026.
The steps to create lines. I created next animation following these steps:

1. Create a background
Here add a gradient colored background.
- Add new layer Solid from New > Solid
- Add Gradient Ramp effect. For eaxmple, On the layer, go to Effects > Effects & Presets, search "Ramp" and add it
- Set Start Color and End Color, like end color gets darker.
- Set Ramp Shape to Radial Ramp
- Click and drag the Start of Ramp (the center) and End of Ramp (the outer radius)
- Optional? Set Ramp Scatter to like 200 to make it nicer looks
2. Create a center light
- Add new Solid Layer and add a Fill effect
- Change the Color yellow
- Set Transform > Rotation on 45 degrees
- Set Transform > Scale to make it cover an entire screen
- Set a mask
- Select Rectangle Tool on a tool bar and create a Mask on the layer with the part of the central light
- Set Mask Feather. For example, 250. It makes a rectangle blur
- Set Mask Expansion to make the light wider or narrower.
3. Create the base shadow line layer
- Duplicate the center light layer and rename it "Line Shadows 01"
- Remove the Fill effect
- Add a Fractal Noise effect
- Set the Property of the fractal noise effect
- Set Contrast to, for example, 2500, to remove blur
- Set Brightness to, like 300, to separate white and black are clear
- Go to Transform and update the scale to look noises become noises with lines instead of rounded shapes
- Disable Uniform Scaling
- Increase scale width and decrease scale height
- Animate the layer using Transform > Offset Turbulence
- Create keyframe on the first layer for Offset Turbulance
- Create keyframe on the last layer for Offset Turbulance, and set different values from the first key frame.
- Alt-click Sub Settings > Evolution and set
time * Xin Expression. This is to increase the speed of a line
- Change the color of the lines
- Set "Blending Mode" to Multiply. I needed to click "Toggle Switches / Modes" on the bottom bar to show the Mode on each layer.
- To make the color lighter,
- Add an effect CC toner
- Change the Tones to Duotone
- Set Shadows to the color darker than the background
4. Add more variations of the shadow lines
Add as many layer as you want.
- Duplicate the above "Line Shadows 01" layer into new layer
- Update some properties to make them look different from the 01 layer. For example,
- Update Contrast, Brightness, or Scale
- Alt click Sub Settings > Evolution and set the expression like
time - 200
5. Create highlights
Add as many layer as you want.
- Duplicate some shadows layer of existing highlights layers, and rename those layers to "Line Hightlights 01"
- Set Blending Modes of the new layer "Screen"
- Or set "Add" in a few layers depending on how they look
- Update "CC Toner" effect
- Set "Highlights" to the black
- Set "Shadows" to the brighter color
- Add some variations
- Update Fractal Noise > Brightness
- Update Fractal Noise > Transform > Offset Turbulance
- Update Fractal Noise > Transform > Rotation
- Add more variations by adding Glow effect. And update
- Glow Threshold
- Glow Radius
- Glow Intensity
6. Create corner shadows
- Duplicate the center light layer and rename it to a "corner shadows" layer
- Update the Mode of "Mask 1" to Subtract from Add
- Set the Fill > Color black
- Set the Transform > Opacity not to make too dark
Corner light variation
This section was written in June 28, 2026.
The above steps can be used for other cases like this animation.

1. Create a background in the same way
2. Create the base shadow layer
On top of the same step as above.
- Add Corner Pin effect on the Line Shadows layer
- Drag the positions of each edge of the corner pin to move lines from one edge to another edge
3. Add shadow and highlight lines
Add shadow and highlight lines by following the same steps.
4. Add soft light
- Add new Solid layer
- Add new mask with rounded shape
- Set Mask Feather and Mask Expansion
- Set Blending Modes to Add
- Add Fill effect and set the color
5. Add main light
- Add new Solid layer
- Set Blending Modes to Screen
- Add new mask with light emitting layer
- Animate Mask Path by creating multiple key frames with multiple shapes
- Add CC radial Radial Fast Blur effect
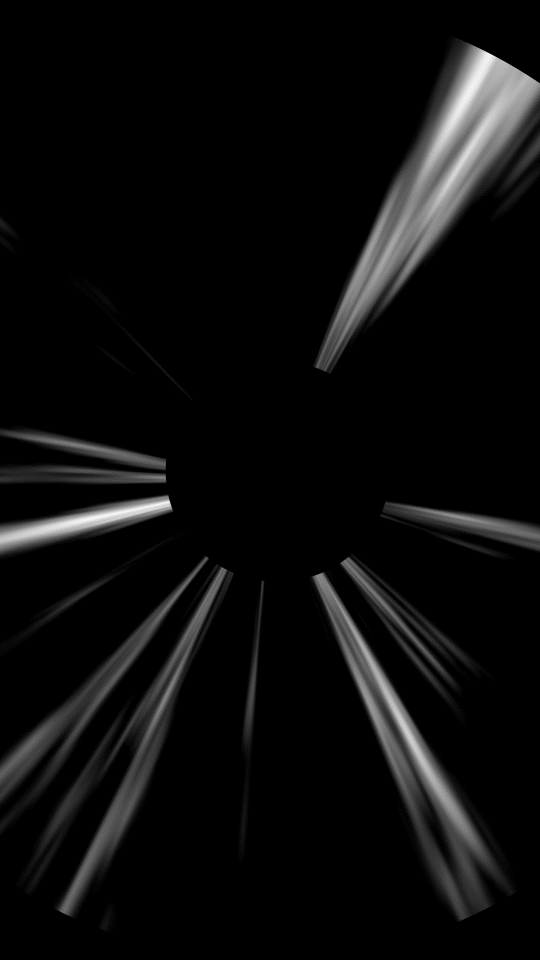
Zoom speed lines variation
This section was written in July 3, 2026 and result of animation looks like next:
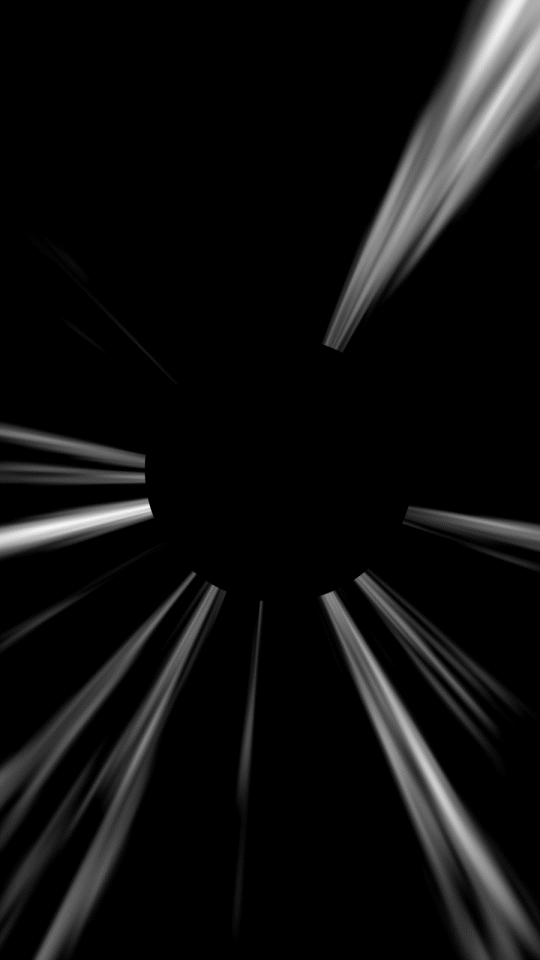
This is the variation explained from the video:
In this video, "Turbulent Noise" effect is used instead of "Fractal Noise". And the most important effect for this zoom version is the
1. Add speed lines
This is almost the same steps as "Create the base shadow line layer" on the above steps
- Add new Solid layer, and add Turbulent Noise effect
- For the effect on the layer
- Set Contract to higher value to reduce blur
- Set Brightness to lower value to reduce white pixels
- Disable Transform > Uniform Scaling
- Set Transform > Scale Width and Transform > Scale Height to such values that lines can be seen.
- Animate the effect by
Alt Click Transform > Offset Turbulence
While the entire expression of Offset Turbulence was selected, drag a spiral icon of Offset Turbulence into the offset of Offset Turbulence 3. It should change an expression from
effect("Turbulent Noise")(13)to nexttemp = effect("Turbulent Noise")("Offset Turbulence")[0]; [temp, temp]Update the 2nd line from
[temp, temp]to[temp, time * 5000]. This changes the Y axis's value depending on a time frame.
2. Update speed lines to animate from one point
- Add new Adjustment layer and add an effect "Polar Coordinates"
- For the effect on the new layer
- Set Type of Conversion to "Rect to Polar"
- Set Interpolation to 100%
3. Hide the central point
- Add new Solid layer
- Set the background of the layer to Black
- Select a mask of "Ellipse tool" and mask the center of the point
4. Move the speed lines to the edge of a screen.
The video explained until the above steps. However, I've seen that there was the empty spaces that lines do not move on the edges.
So in order to make lines move to them, I needed to do these changes.
- Pre-compute all layers.
- Set Transform > Scale on the composition to make the speed line go to the edges