Blender: Animate a gradient material
This post was written using Blender 4.0.
This blog is about to create the animation for color gradient. The final output of this post is like next:
Step 1. Add a color gradient
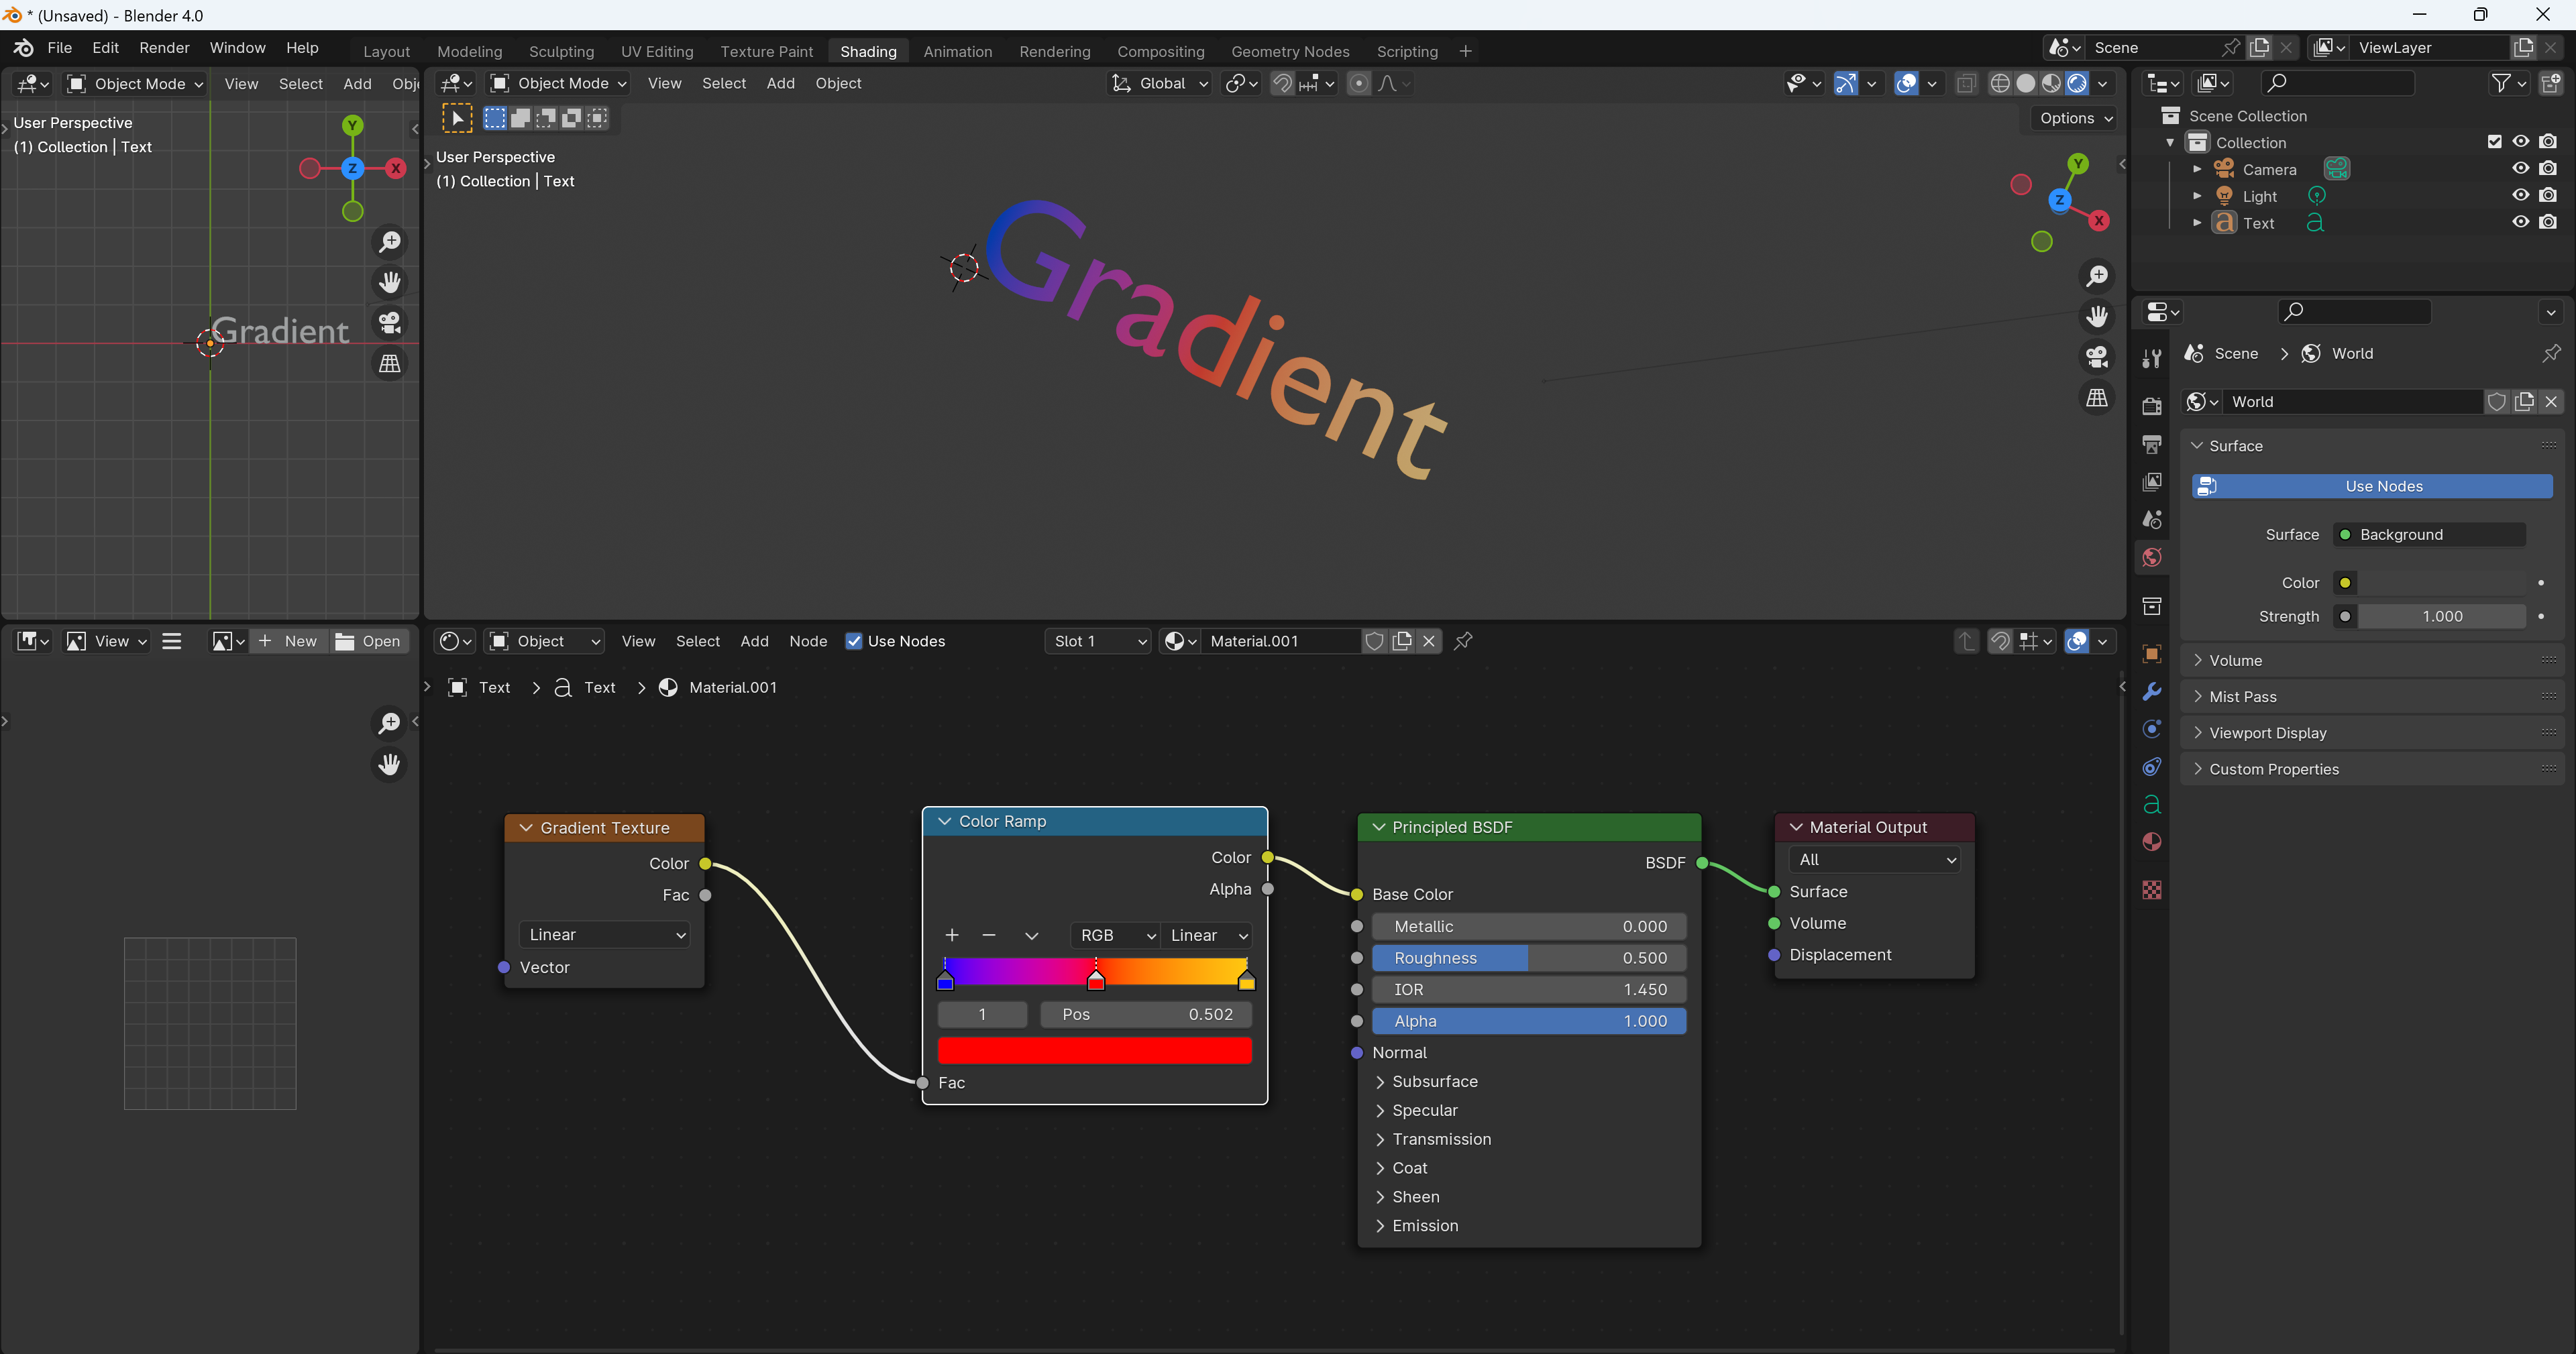
To add color gradient to a material, go to the Sharding tab and update nodes like the next.

This is basically by:
- Add a Texture > Gradient Texture node
- Add a Converter > Color Ramp node between Gradient Texture and Principled BSDF
Step 2. Animate a color gradient
- Add Vector > Mapping, Input > Texture Coordinate, and Converter > Separate XYZ nodes
- Connect inputs and outputs of each node by followings:
- Connect Generated of Texture Coordinate to Vector of Mapping
- Connect Vector of Mapping to Vector of Separate XYZ
- Connect Z of Separate XYZ to Fac of Color Ramp
- This value will be changed on the step 3, but change the Z value of the Mapping node and insert the keyframe on a frame appropriately to animate.
- Set the same color for the pos = 0 and pos = 1 on
Color Ramp. - Set z=1 on 100 frames, z=-1 on 101 frames, and z=1 on 200 frames
- Set the same color for the pos = 0 and pos = 1 on
By following the above, the animation becomes like next.
Now it's possible to animate, but there is an issue that the animation shows the red color too long and not smooth to transition to another color.
Step 3: Smoothly loop the gradient animation
To solve the issue on the step 2, update nodes like next
- Add 3 Converter > Math nodes and change 2 nodes from Add to Truncated Modulo and Less Than.
- Update values of the nodes to followings
- Truncated Modulo
- 1st Value: the Z of the Separate XYZ node
- 2nd Value: 1.0
- Less Than
- 1st Value: the Value of the Truncated Modulo node
- 2nd Value: 0
- Add
- 1st Value: Value of the Truncated Modulo node
- 2nd Value: Value of the Less Than node
- Output Value: Fac of the Color Ramp node
- Truncated Modulo
- Change the Z of the Mapping node on
- 1st frame: 0
- 100 frame: 5
The each Math node is described in this official document. I think these nodes are to convert the value of Z of Mapping between 0.0 to 1.0.
By following the above steps, we completed the gradient animation and made the one like the first video on the top of this post.
Reference
For Step 1, I referred to the next video.
For Step 2, I referred to the next video.
For Step 3, I referred to this stackoverflow answer.